Posts Tagged ‘ASUS

15
Nov
09

eeebuntu on Asus eeePC 900

eeebuntu

You thought it was over, didn’t you? From windows to SuSe, to EasyPeasy, I’ve been trying to find which OS suits me best for my little friend and now, I’m back with one more experiment: eeebuntu!

I liked EasyPeasy. It was fast, neat looking and most of all it did the job, save for one little thing. Network Manager. Now, I have absolutely no idea why it happened, but if it would lose a connection, it faced difficulties reconnecting to a network and some times it would require a reboot. Depending on where I was, this was not necessairily a problem, but anyway it was not a feature I chose to have, right?

I needed to have my eeePc working, so I went back to using Suse. Suse has a very nice design, lots of eye-candy and functionality, but it is not suited for 900MHz and 1 GB of RAM on an SSD. It was terribly slow. Another distro please!

After some digging around, I came across this useful article where Pale Heretic lists 5 linux distros suitable for a netbook. Having already tried two of them, Suse and easy peasy, I had three more alternatives: Mandriva, Fedora and eeeBuntu. The three e’s in eeeBuntu, made my dillema pretty clear. I went for eeeBuntu.

When you visit eeebuntu.org, you are greeted with a set of three options, as to which flavour of eeebuntu you want to install. Normally one would choose NBR, which features a design similar to that of easy peasy. I wanted something that looks more like a “real” desktop so I chose the standard version. There’s also a base version, with little extras, so you can add as many programs you want yourself.

I downloaded the iso and made sure the MD5 was correct. Since we are talking about an OS, you want to make sure you don’t have a corrupted download! There are many programms that calculate MD5 sums, so google away!

You now have two options to install eeebuntu on the eeePc. 1) Burn the ISO on a disk and find an external drive. 2) Transfer the ISO on a USB stick.

Since I do not have an external DVD-ROM drive, I had to choose the second option. Thankfully, there’s UNetbootin, a tiny programm that transfers a Linux Distribution onto a USB drive! Neat!

unetbootin

You want to choose the second option and point to the right letter for your USB. No need to say that all data you might have on the drive will be lost, right? When the procedure is over, you only need to plug the USB drive, reboot your eeePC and boot from the USB. What you have on your screen now, is a Live Version of eeebuntu, which means, nothing was changed on your hard drive. You can play a little bit with it, see if it suits you and if you decide to do so, just double click on the install icon on the desktop.

standard_1_400

The installation procedure was easy as abc, I just had to choose the “Use Entire Disk” option and that was all. Everything worked out of the box, I only had to tweek some appearance settings, desktop wallpaper and the like.

I am very satisfied with my new distro. It is fast, It has many programms preinstalled and I like the design. It comes with Gnome desktop, but I am sure one can intall KDE easily enough. I think I might be sticking with this one for a while 🙂

04
Aug
09

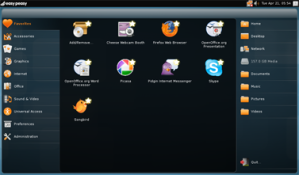
Easy Peasy on eeePc 900. Maybe not so easy

easypeasy-1.1

Until very recently, my eee900 was running on Suse Linux.  I was more than happy with it, I liked the look and feel of it, I liked the fact that it was waaaay faster than windows and generally I thought we two were going to stick together for a long time. I did not know of one little detail though:

Vpn connection. I needed to be able to connect to my workplace through PPTP, since we are using windows machines there, and no matter what I did, I couldn’t make it work. Network manager, had support for vpn, but not pptp tunneling, so I resorted to Google and spent a whole day trying all kinds of remedies to no avail. My colleague, the one who talked me into installing Suse in the first place, had pptp up and running on his own machine and that only frustrated me more. It only meant that there was a way to make it work, I just hadn’t found it yet. When I asked him how he had done it, he said he could not remember (of course) but he could use Norton Ghost to bring his own image onto my machine. I agreed and gave him my eee, because I thought that having vpn was better than having to re-fine-tune suse. Due to a *slight* mistake on his side, I ended up booting in Windows home again (he had used the wrong image to restore on my eee), which solved me one problem (I now had vpn), but created a whole lot more (speed, hiccups, poor performance) .

The dilemma: Keep windows and try to speed them up, or re-install suse?

The windows user in me was screaming for the first option and I quickly found my self  browsing through this thread and installing nLite. For the record, I believe the instructions on the thread above are fantastic and to my knowledge they work like a charm, but something did not go well with nLite, so I wasn’t able to complete them. In the past, I have tried some of the tips mentioned in there though and they really make a difference, but still nothing compared to my experience with suse.

The fact that I failed tweaking XP (or sabotaged my self sub-consciously) meant only one thing: Back to Linux! But should I move back to suse, or maybe try something new. While searching for a linux distro that works well with netbooks, I stumbled on Easy Peasy. The scree-shots were nice, it is based on Ubuntu (ie user friendly). So off with the installation!

The OS installation was easier than easy, you only have to follow the instructions given here. One word of advise though: Use an MD5 checker with your download! It will save you a lot of frustration later ;).  I had to download the iso 3 times to finally get it right but it worked like a charm in the end. Almost like a charm…

The very first thing I tried to do was to set up a vpn connection and – what a surprise – I couldn’t. From what I understood, reading countless web sites, was that pptp is not directly supported in linux, and it’s usually used only for windows vpns. I found some great instructions here, but they are great for everybody else, except me, since I could not install network-manager-pptp. For some reason that I cannot understand, the specific package was not available in any of the repositories that were configured in Easy Peasy. There is however an application, similar to Windows “Add Remove Programs” and when I tried that one, it found a pptp client and let me install it. Be sure to select “All Open Source Applications” from the drop down list!

Now, I need to do some extensive testing, but so far I love it.

14
May
09

Asus eeePC 900 – Bios Update.

asus-eee-pc-900-blackToday’s post, is a bit technical I’m afraid. I have to apologise if some of you find it boring, but I think it is a useful piece of info that might help some people.

The story: I have an ASUS eee PC 900, which I bought with windows XP. I worked just fine, save from the short battery life. It supposed to last about 2 hrs, but in my case it lasted no more than an hour with the wlan turned on. While searching through forums, asking around and taking wild guesses, I decided to install linux on it, since it was supposed to treat batteries better. On a whim, I decided to go with SuSe, since I had seen it at a colleague’s computer and it looked nice.

The problem: After I had installed SuSe, I learned that the latest BIOS update, could help with my battery problem. I should say though that SuSe helped a lot, but I had to try that too. Asus supplies tools to perform the update through Windows and Xandros (the Linux that comes with eeePC) but offers little or no help with other OSes. Reading through forums, where everybody suggested all sorts of things, I reached…

The solution: You need a USB stick formatted as FAT16. FAT32 did not work! Then you will have to download the ROM file from ASUS website and rename it to something like 900.ROM (if your model is eeePC 1000, that would be 1000.ROM). Copy the ROM file to the USB stick, plug it in and restart your eeePC. While at the BIOS screen, press ALT and F2 simultaneously. This loads the built in updater. If all goes well, it should detect the USB stick, read the ROM file and start the update procedure. It didn’t take a long time, just a couple of minutes. Then, it will prompt you to restart the machine, and everything will be fine. Remember to re-enable some devices that will be turned off by the new BIOS.

PS: Needless to say that, updating the BIOS could result in damaging your machine, if something goes wrong…


May 2024
M T W T F S S
 12345
6789101112
13141516171819
20212223242526
2728293031